Right now is one of the most beautiful times of year to take photographs! Northern Virginia’s fall foliage typically peaks in the last week of October and the first week of November, so get your camera ready and head outside.
I know many of you share my love of photography and the spectacular trees in the DC area. I’m a photographer by trade, with more than a decade as a professional. Here are a few tips that I’ve learned along the way. Whether you shoot with an SLR or a cell phone, these five tips will help you improve your fall photos.
1. SHOOT WHEN THE SUN IS LOW
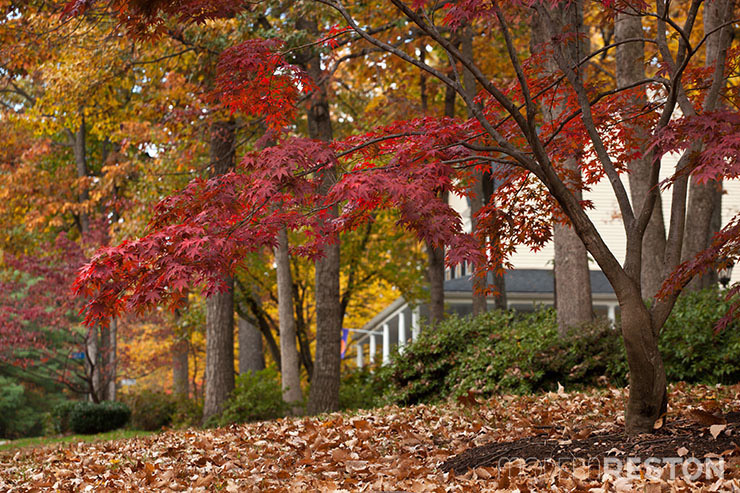
If you try only one of these tips, this is the one to choose. The success of most photographs depends on the quality of the light, and a common guideline is to shoot shortly after sunrise or before sunset. When the sun is low in the sky, the light is softer and warmer. Sunlight during the middle of the day is harsh and blueish. This time of year, the best sunlight hours are before 9:00am and after 5:00pm.
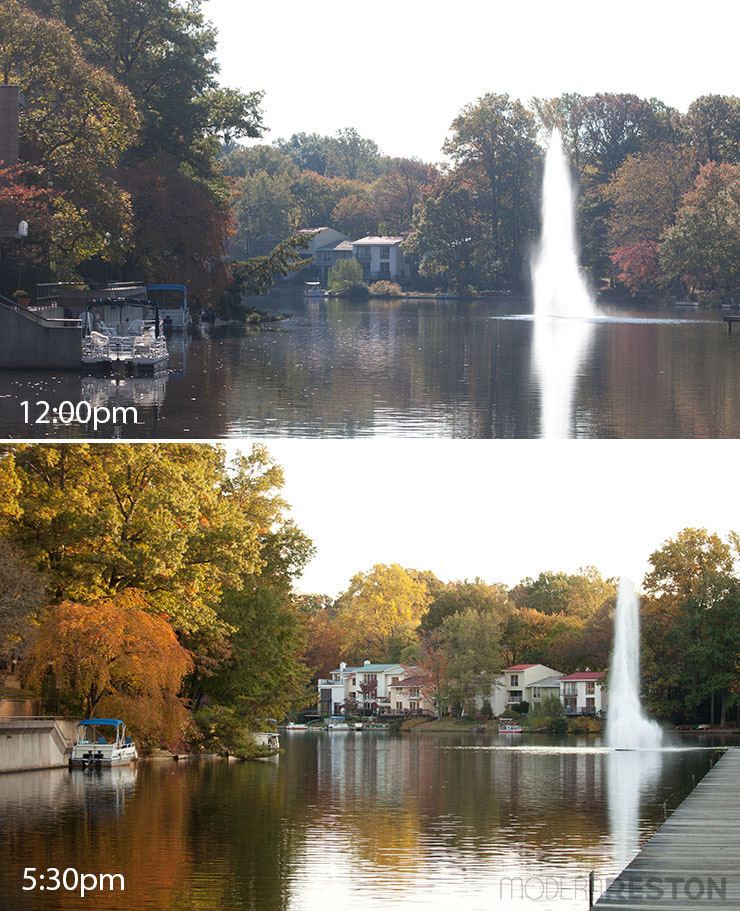
The two photos above were taken on the same day, only a few hours apart. As you can see, the midday sun is blueish and hazy, and washes out the fall colors. Shortly before sunset, the sunlight is golden and more beautiful.
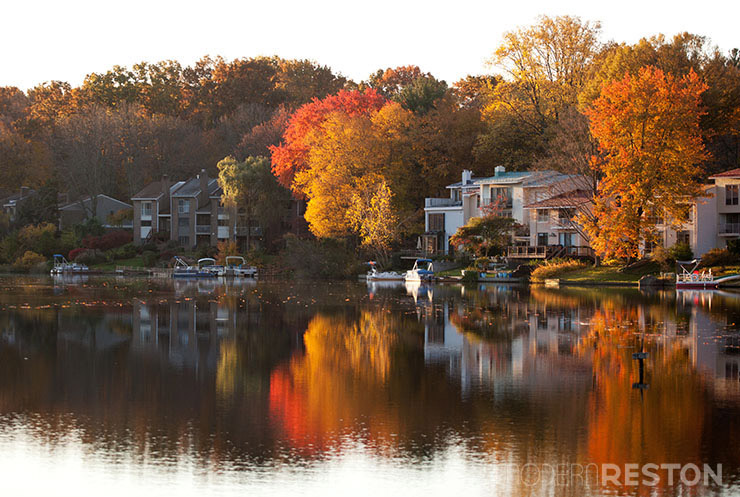
All landscape photos benefit from low sunlight, but fall foliage is especially attractive in this light. You want to enhance the yellow and red colors of the trees, so shoot when the sunlight adds even more warm tones to the scene.
2. EMBRACE OVERCAST DAYS
Low sunlight is beautiful in fall photos, but cloudy days are excellent, too. Overcast sunlight is naturally diffused, and enables you to showcase fall colors without distracting shadows. It also lets you shoot all day long, without having to limit your best hours to sunrise or sunset.
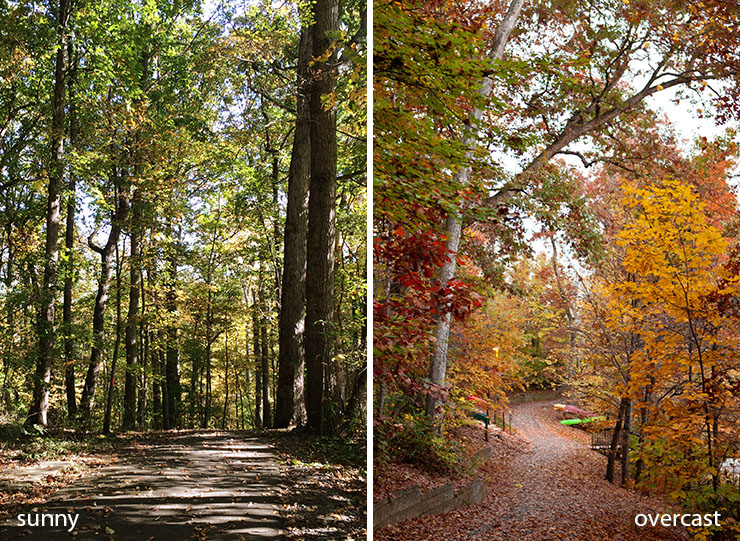
The photo on the left shows the speckled, contrasty light of a sunny day. Because bright sun is blueish, the sunlight also cools down the warm colors of the trees. The photo on the right has no distracting shadows or blue light, so the fall colors are much more vivid.

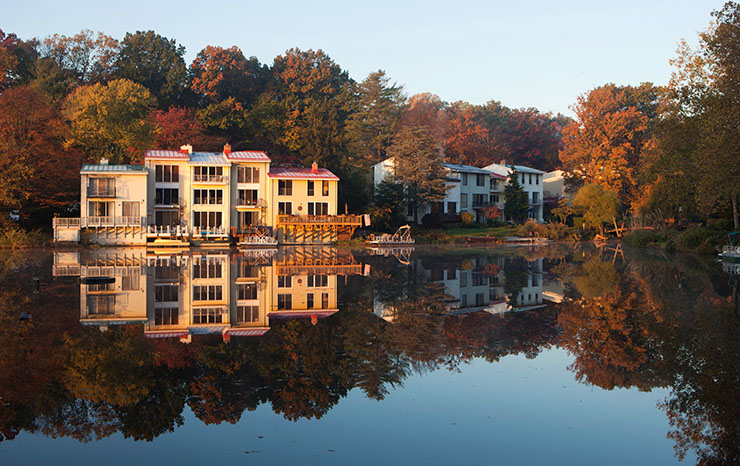
Without harsh shadows to break up these scenes, you can see the richness and softness of the layered colors.
3. TRY BACKLIGHTING
If you do find yourself shooting in bright, midday sunshine, shoot into the sun. Leaves are semi-translucent, so backlighting makes them shine. You will typically need to adjust the exposure to brighten the foreground if you shoot facing the sunlight.
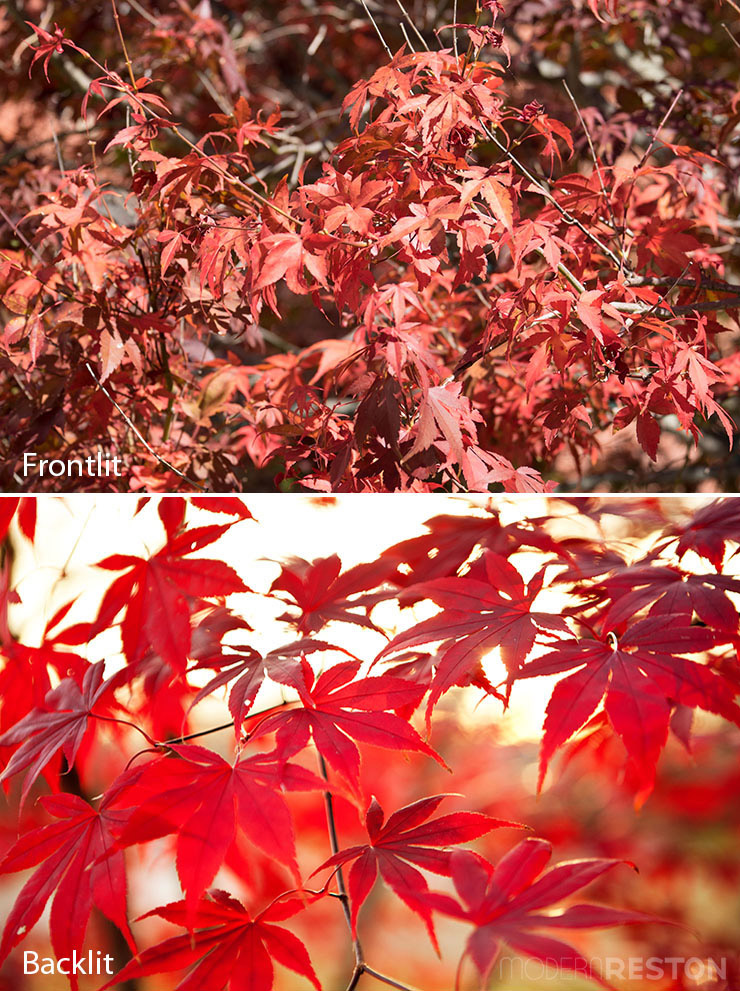
These leaves look dull and flat with front lighting. When the sun shines through them, though, they glow. It’s a huge difference!
I love the way sunlight shines through leaves and makes them sparkle.
4. CHOOSE A FOCAL POINT
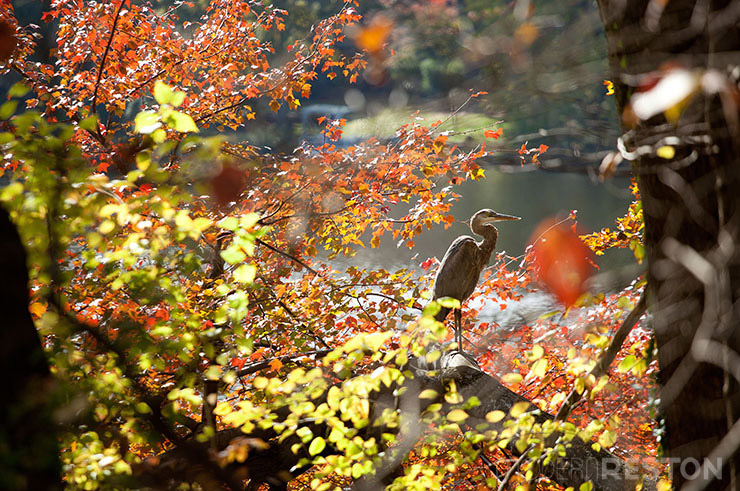
While any grouping of colorful leaves can be beautiful, adding a focal point can make your image more interesting. A focal point tells more of a story, and gives your eye a place to rest. It’s a punctuation mark for your image. Your focal point can be a person, an animal, an interesting leaf, a tree of a different color, a trail leading into the distance, or whatever you choose to emphasize.
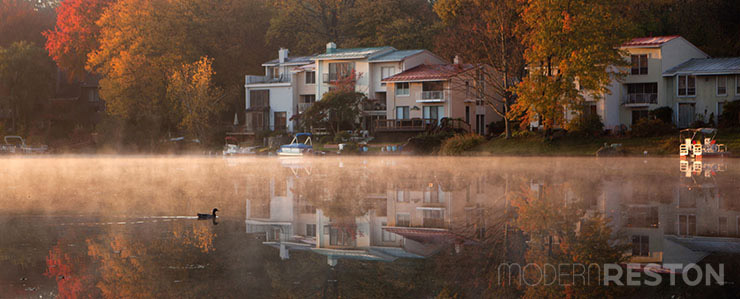
A misty lake at sunrise is beautiful on its own, but a duck swimming through the mist adds life to the image.
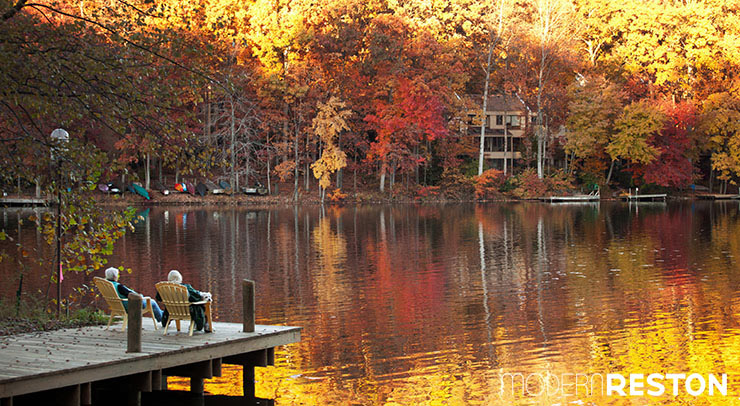
Including this couple in the photo tells a story about lifestyle and appreciation of nature.
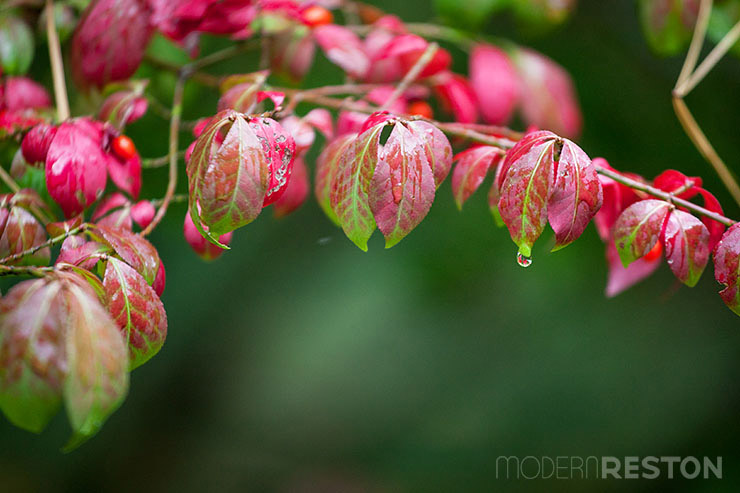
One raindrop catches the eye before it falls to the ground.
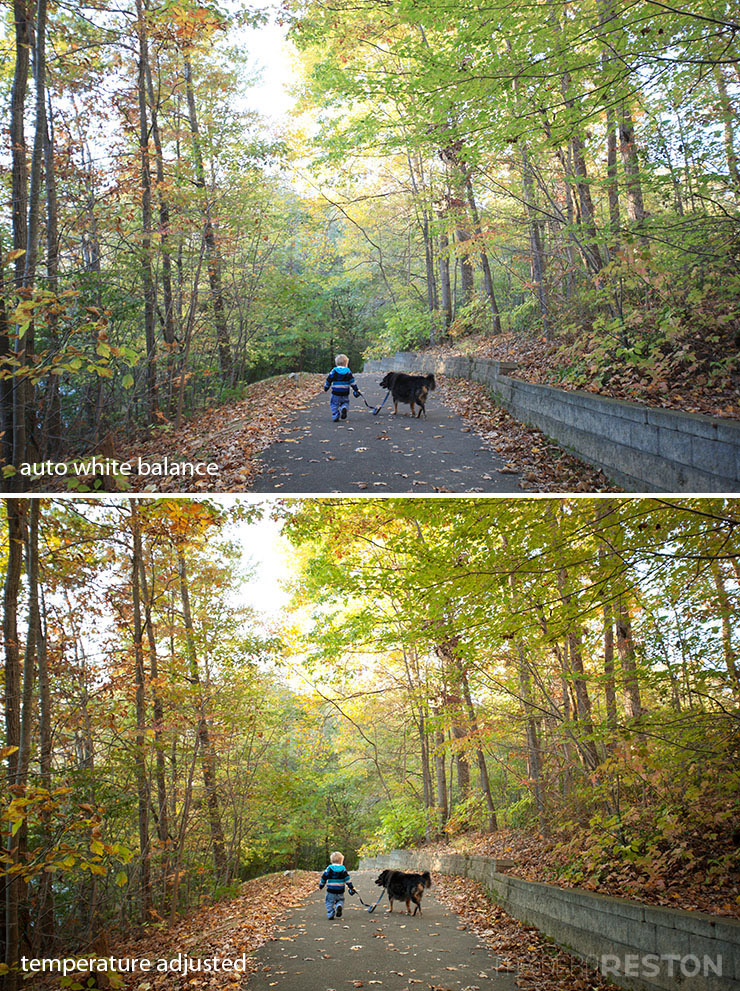
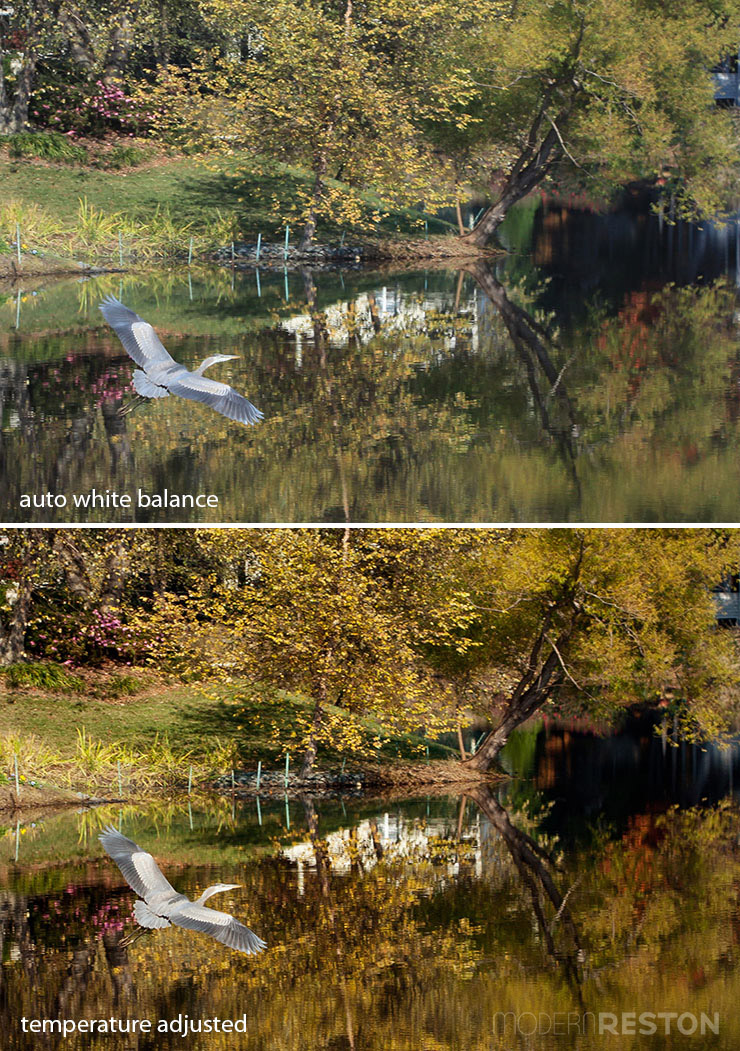
5. ADJUST COLOR TEMPERATURE IN POST-PRODUCTION
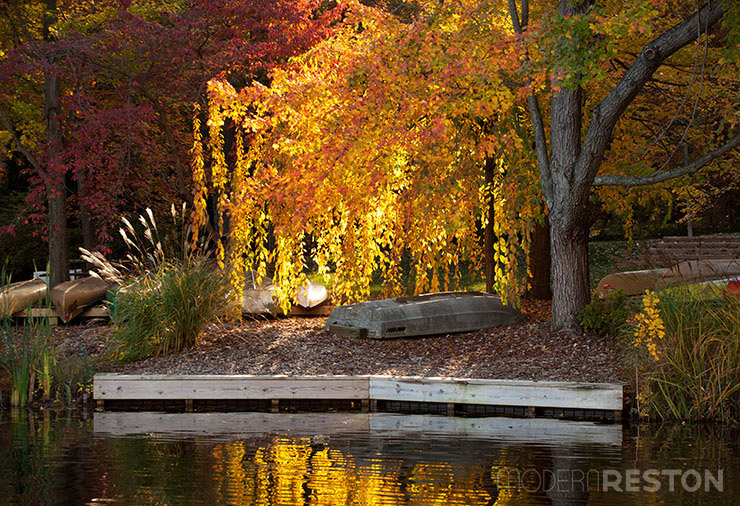
After you’ve taken your photos, you may want to enhance them on your computer or phone to add the finishing touches. Increase the color temperature of your photos by adding more yellow and a bit of red. This process is also known as “increasing warmth.” You can also shoot with your camera’s shady or cloudy color temperature settings, but I often find that they make a scene too yellow. I prefer to shoot with auto white balance, and add more subtle color adjustments afterward.
For post-production, I use Adobe Lightroom and Photoshop on my computer. These software applications are expensive, so you might want to check out Gimp, which is a free, open-source photo editor. On my phone, I like to use PicTapGo or the Instagram application to edit my photos.
The leaves in these two sets of photos were much more golden in real life than they were in my photos. In both cases, I warmed up the photos with additional yellow and some added contrast.
Be careful not to go overboard with your photo adjustments. Keep nature looking natural! Avoid most of the over-the-top filters in photo apps, and strive for beautiful compositions and realistic colors instead.
These five techniques should help you get on your way to improving your fall photographs. Of course all art is subjective, so these strategies might not work for your vision. But give them a try as you shoot, and see what you come up with. If you take any fall photos that you want to share, we’d love to see them! You can post them here or at [email protected].
Related stories:
Trail Tour: The Splendor of Lake Newport in the Fall
Trail Tour: Lake Audubon’s Breathtaking Fall Scenery
A Reston Aerial Photographer Whose Technology is Half of His Art